- English
- 简体中文
- Esperanto
- Afrikaans
- Català
- שפה עברית
- Cymraeg
- Galego
- 繁体中文
- Latviešu
- icelandic
- ייִדיש
- беларускі
- Hrvatski
- Kreyòl ayisyen
- Shqiptar
- Malti
- lugha ya Kiswahili
- አማርኛ
- Bosanski
- Frysk
- ភាសាខ្មែរ
- ქართული
- ગુજરાતી
- Hausa
- Кыргыз тили
- ಕನ್ನಡ
- Corsa
- Kurdî
- മലയാളം
- Maori
- Монгол хэл
- Hmong
- IsiXhosa
- Zulu
- Punjabi
- پښتو
- Chichewa
- Samoa
- Sesotho
- සිංහල
- Gàidhlig
- Cebuano
- Somali
- Тоҷикӣ
- O'zbek
- Hawaiian
- سنڌي
- Shinra
- Հայերեն
- Igbo
- Sundanese
- Lëtzebuergesch
- Malagasy
- Yoruba
- Español
- Português
- русский
- Français
- 日本語
- Deutsch
- tiếng Việt
- Italiano
- Nederlands
- ภาษาไทย
- Polski
- 한국어
- Svenska
- magyar
- Malay
- বাংলা ভাষার
- Dansk
- Suomi
- हिन्दी
- Pilipino
- Türkçe
- Gaeilge
- العربية
- Indonesia
- Norsk
- تمل
- český
- ελληνικά
- український
- Javanese
- فارسی
- தமிழ்
- తెలుగు
- नेपाली
- Burmese
- български
- ລາວ
- Latine
- Қазақша
- Euskal
- Azərbaycan
- Slovenský jazyk
- Македонски
- Lietuvos
- Eesti Keel
- Română
- Slovenski
- मराठी
- Srpski језик

Expansion Bolts: One Wrong Choice and Your Entire Wall Could Be a Total Loss
Hanging a shelf, mounting a water heater, securing an air conditioner condenser—these seem like simple jobs. But the real lifeline is hidden in those few unassuming expansion bolts. Choose correctly, and they hold for a decade. Choose wrong, and one night you hear a dull crash as your wall fixture, equipment, and surrounding decorations come down together. The loss is not just the broken items—it is time, peace of mind, and potentially safety.
The practicality of an expansion bolt does not lie in how sophisticated it looks. It lies in whether it properly matches the wall type, the load, and the environment.
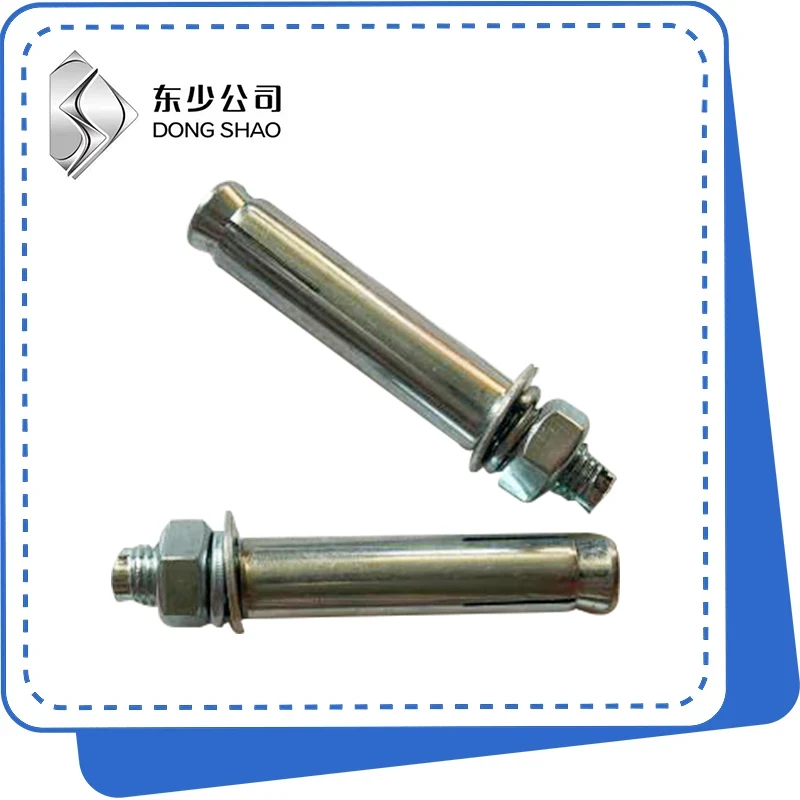
What Does an Expansion Bolt Actually Do
The essence of an expansion bolt is simple: it converts the rotational action of tightening into a locking action of expansion.
When you turn the nut, the bolt shaft pulls outward, drawing the tapered end into the expansion sleeve. The sleeve is forced outward, jamming itself tightly against the walls of the drilled hole. The tighter you turn, the firmer it locks. The critical point is this—it relies on mechanical interlock, not just friction. As long as the hole is correct and the sleeve expands properly, even vibration will not easily loosen it.
The core process has only three steps:
-
Drill a precisely sized hole in the wall
-
Tap the expansion bolt into the hole
-
Tighten the nut, expand the sleeve, and complete the anchor
The steps are deceptively simple. But get any single detail wrong, and the result is completely different.
Look at the Wall First, Then the Bolt
This is the first unbreakable rule of selection: Not every expansion bolt works in every wall.
| Wall Type | Suitable Anchors | What to Avoid |
|---|---|---|
| Solid concrete | Nearly all types (metal expansion, chemical anchors) | None |
| Hollow brick / perforated brick | Hollow-wall expansion bolts, chemical anchors | Standard metal expansion bolts (will not expand properly, crack the brick) |
| Aerated concrete block | Chemical anchors, dedicated nylon anchors | Heavy-duty metal expansion bolts (insufficient grip) |
| Drywall / light-gauge steel stud | Drywall specific anchors, toggle bolts | Ordinary expansion bolts (no backing means no expansion) |
| Natural stone (marble, etc.) | Chemical anchors | Hammer-in expansion bolts (risk of cracking the stone) |
A hard truth: Most fallen shelves and collapsed fixtures are not due to poor bolt quality. They happen because the installer never figured out what kind of wall they were drilling into. Driving a standard concrete expansion bolt into a hollow brick wall—the brick cracks the moment the sleeve expands. It feels solid the first day. By the second day, it is already loose.
Bigger Is Not Always Better
There is a natural instinct: go larger. If M6 will hold it, why not use M10? This is a mistake.
The load capacity of an expansion bolt depends on two factors: the strength of the bolt itself and the holding strength of the wall. When the bolt exceeds the wall's limit, the failure will not be the bolt breaking—it will be the wall itself failing. The hole edge crumbles, and the surrounding concrete or brick tears out.
Below are reference pull-out load ranges for common sizes in solid concrete:
| Size | Hole Diameter (mm) | Effective Embedment (mm) | Reference Pull-out Load (kN) | Typical Application |
|---|---|---|---|---|
| M6 | 8 | 40 | Approx. 2–3 | Small shelves, picture frames, light fixtures |
| M8 | 10 | 50 | Approx. 4–6 | Medium shelves, water heater brackets |
| M10 | 12 | 60 | Approx. 6–9 | AC condensers, small equipment |
| M12 | 16 | 70 | Approx. 10–15 | Heavy equipment, large brackets |
| M16 | 20 | 80 | Approx. 20–25 | Industrial equipment, steel structure anchors |
Selection logic: Calculate the load first, choose the size, then apply a safety factor of at least 2x. If your equipment weighs 50 kg, M8 is more than sufficient. There is no need to step up to M10.
Installation: Eighty Percent of Problems Happen Right Here
The barrier to installation is extremely low. That is exactly why so many people get burned by small details.
1. Hole Diameter—One Millimeter Makes the Difference
The product packaging specifies the required drill bit size. For an M10 expansion bolt, it calls for a 12 mm hole.
-
Too small: The bolt will not go in. Forcing it damages the expansion sleeve, leading to uneven expansion and severely reduced holding power.
-
Too large: The sleeve cannot grip the hole wall when it expands. The anchor is effectively useless.
Correct practice: Use calipers to verify the drill bit diameter, or use the manufacturer-recommended matching bit. Never estimate.
2. Hole Depth—Too Shallow Means No Hold
The hole must be deeper than the bolt's effective embedment length. The rule of thumb: hole depth = bolt length + 5–10 mm extra. This ensures the entire expansion sleeve sits fully inside the hole so the tapered end can expand properly.
If the hole is too shallow, the sleeve never fully enters the hole. The expansion happens outside the hole, and you have achieved nothing.
3. Hole Cleaning—Skip This and You Might as Well Not Drill
This is the single most neglected step. Drilling generates a significant amount of dust. If you do not blow the dust out:
-
Dust fills the gap between the expansion sleeve and the hole wall, creating a lubricating layer
-
The sleeve cannot seat firmly against the wall
-
Holding strength can drop by 30% to 50%
Correct practice: Use a blow bulb or compressed air to thoroughly clear the dust from the hole. Follow with a brush to clean the walls.
4. Tightening Torque—Tighter Is Not Always Stronger
Once the sleeve is fully expanded and seated against the hole wall, additional torque only stretches the bolt. Over-tightening can:
Neck down and fracture the boltOver-expand and deform the sleeve, reducing its spring-back ability
Correct practice: Stop when you feel a clear increase in resistance, typically after 1.5 to 2 turns past initial contact. For critical equipment, use a torque wrench and follow the manufacturer's specified value.
Common Failure Scenarios and Diagnosis
| Symptom | Likely Cause | How to Diagnose |
|---|---|---|
| Bolt spins when tightening; sleeve does not expand | Hole too large; sleeve already deformed | Check drill bit size; use correct diameter |
| Fixture becomes loose after some time | Wall material too soft; insufficient embedment | Switch to chemical anchor; drill deeper hole |
| Loud squeaking sound when tightening | Hard debris in hole; sleeve binding | Back out, inspect, and thoroughly clean the hole |
| Anchor pulls out with minimal force | Hole dust not cleaned; hole is wet | Redrill, clean thoroughly, and reinstall |
| Fixture slowly sags after installation | Wall cracked; expansion bolt pulled out | Remove immediately; use alternate anchoring method |
Special Scenarios and Solutions
Ceiling Mounting
The load direction on a ceiling is different from a wall. Expansion bolts here are subject to tension rather than shear. For the same bolt size, the ceiling load capacity is roughly half of the wall capacity. Always use expansion bolts with built-in anti-loosening washers and ensure adequate embedment depth.
Wet or Outdoor Environments
Standard zinc-plated expansion bolts will rust within a year outdoors. Use hot-dip galvanized or stainless steel (304/316) bolts instead. For coastal or chemical environments, 316 stainless steel is the only choice.
Vibrating Equipment
Air conditioning condensers, compressors, and other vibrating equipment create continuous motion that can gradually loosen ordinary expansion bolts. Use locking nuts or chemical anchors, and apply thread-locking compound during installation.
Conclusion: Small in Size, Big in Consequences
The humble size of an expansion bolt hides its true importance. A small part that costs only a few dollars, if selected incorrectly or installed poorly, can bring down an entire piece of equipment, an entire decorative wall, or even an entire safety system.
Correct selection requires only three things:
-
Know your wall—Concrete or hollow brick? Any insulation layer?
-
Calculate your load—What is the weight? Static or dynamic?
-
Follow the procedure—Use the right drill bit, clean the hole, and torque it properly.
Installing an expansion bolt has a low barrier to entry. But every single detail determines how long it will hold. Do not rely on gut feeling for this.